05 – Managing patients
In the “Patients” area you create patient data and maintain the patient file. You reach it via the sidebar.
5.1 Patient list
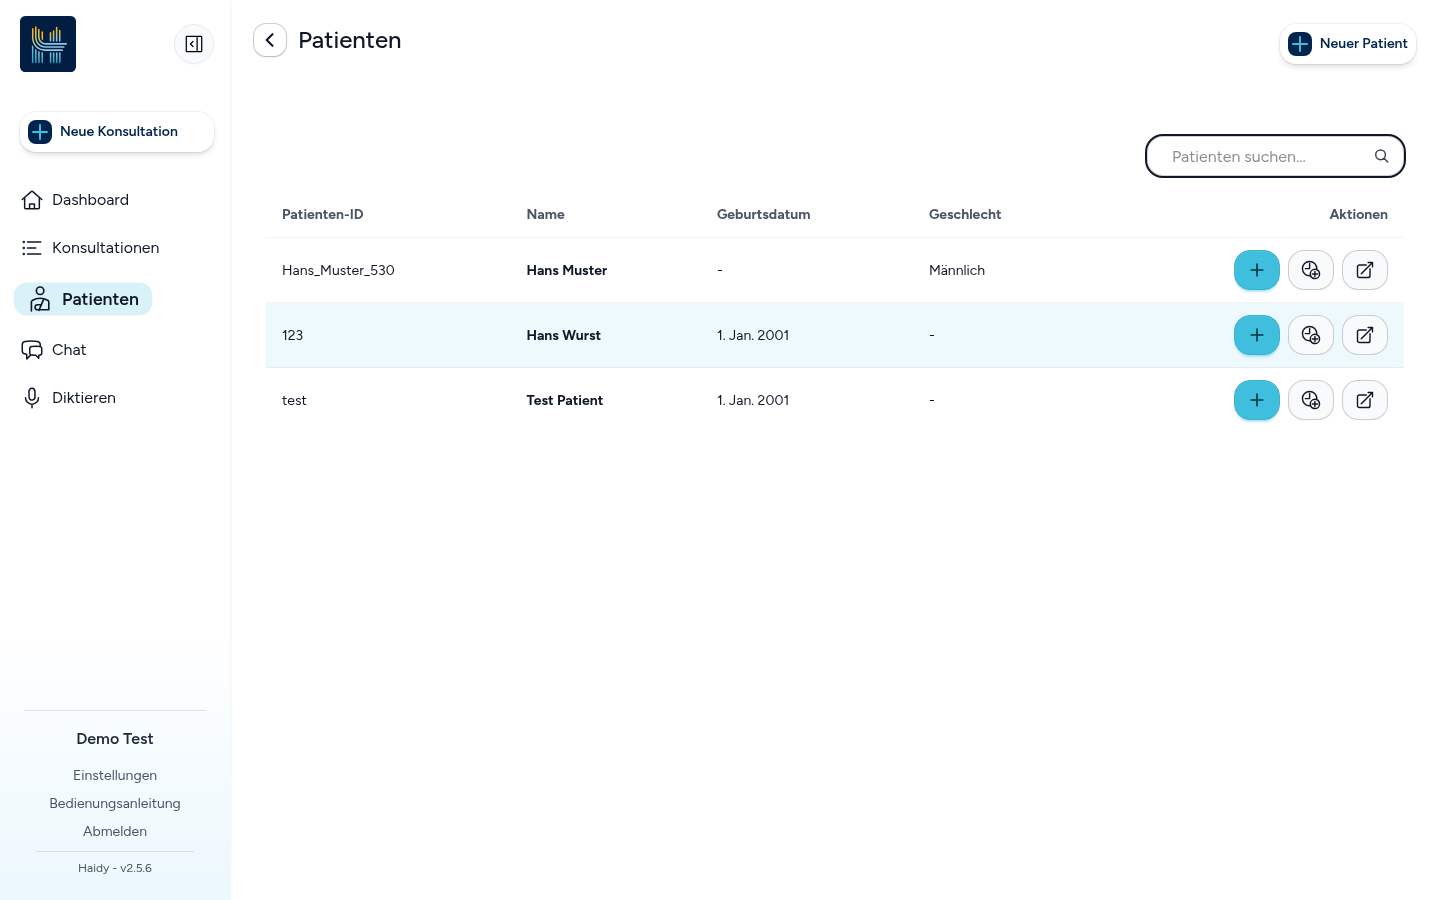
The list shows all patients as a table:
| Column | Description |
|---|---|
| Patient-ID | Unique identifier (e.g. Hans_Muster_530) |
| Name | First and last name |
| Birth Date | Date of birth of the patient |
| Gender | Gender (if recorded) |
| Actions | Quick actions per patient |
Use the search field “Search patients...” to filter the list by name or patient ID.
Rearranging and resizing the table
You can adapt the table to your workflow: drag a column by its handle to move it, or use the left/right arrow keys while a column handle has focus. Drag the edge of a column to change its width. Haidy remembers your layout as a personal setting; “Reset table layout” restores the default order and widths.
Quick actions per patient
| Action | Purpose |
|---|---|
| Start Consultation (+) | Start a new consultation for this patient |
| Plan Consultation | Plan an appointment for this patient |
| Open Patient Overview | Open the patient file |
5.2 Creating a new patient
Click on “New Patient”. The “Create Patient” dialog opens:
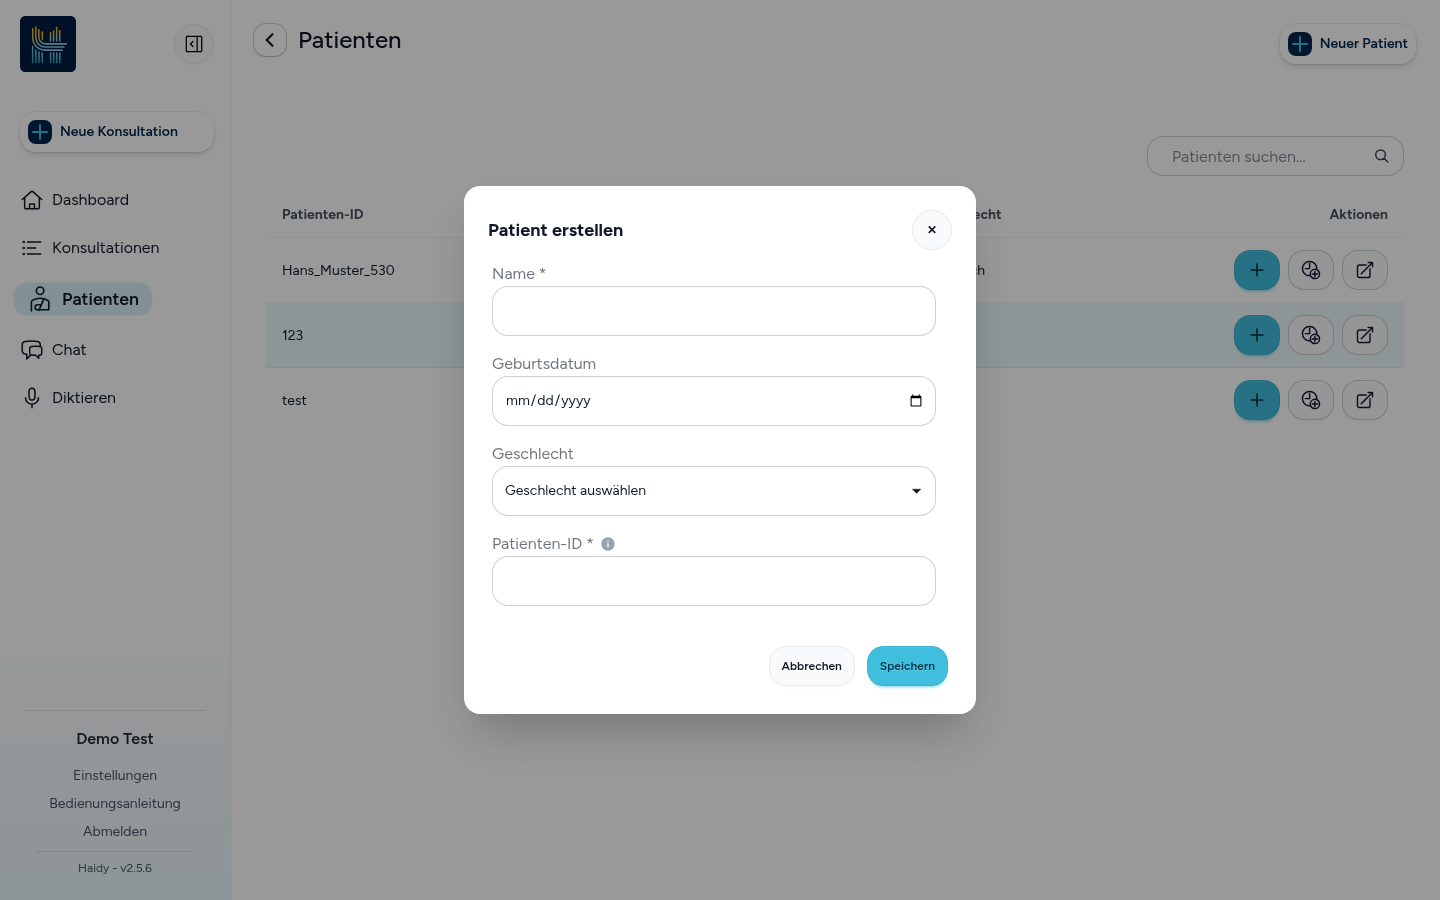
| Field | Description |
|---|---|
| Name * | Full name of the patient |
| Birth Date | Date of birth (selectable via the calendar icon) |
| Gender | Drop-down list (e.g. Male/Female) |
| Patient-ID * | Unique identifier – suggested automatically, but can be adapted |
Confirm with “Save” or cancel with “Cancel”.
Tip: The more complete the master data (especially the date of birth), the better Haidy can create the reports. Haidy points out missing information with a notice in the patient file.
5.3 Patient file (timeline)
Click on a patient ID, the name or “Open patient overview” to open the patient file:
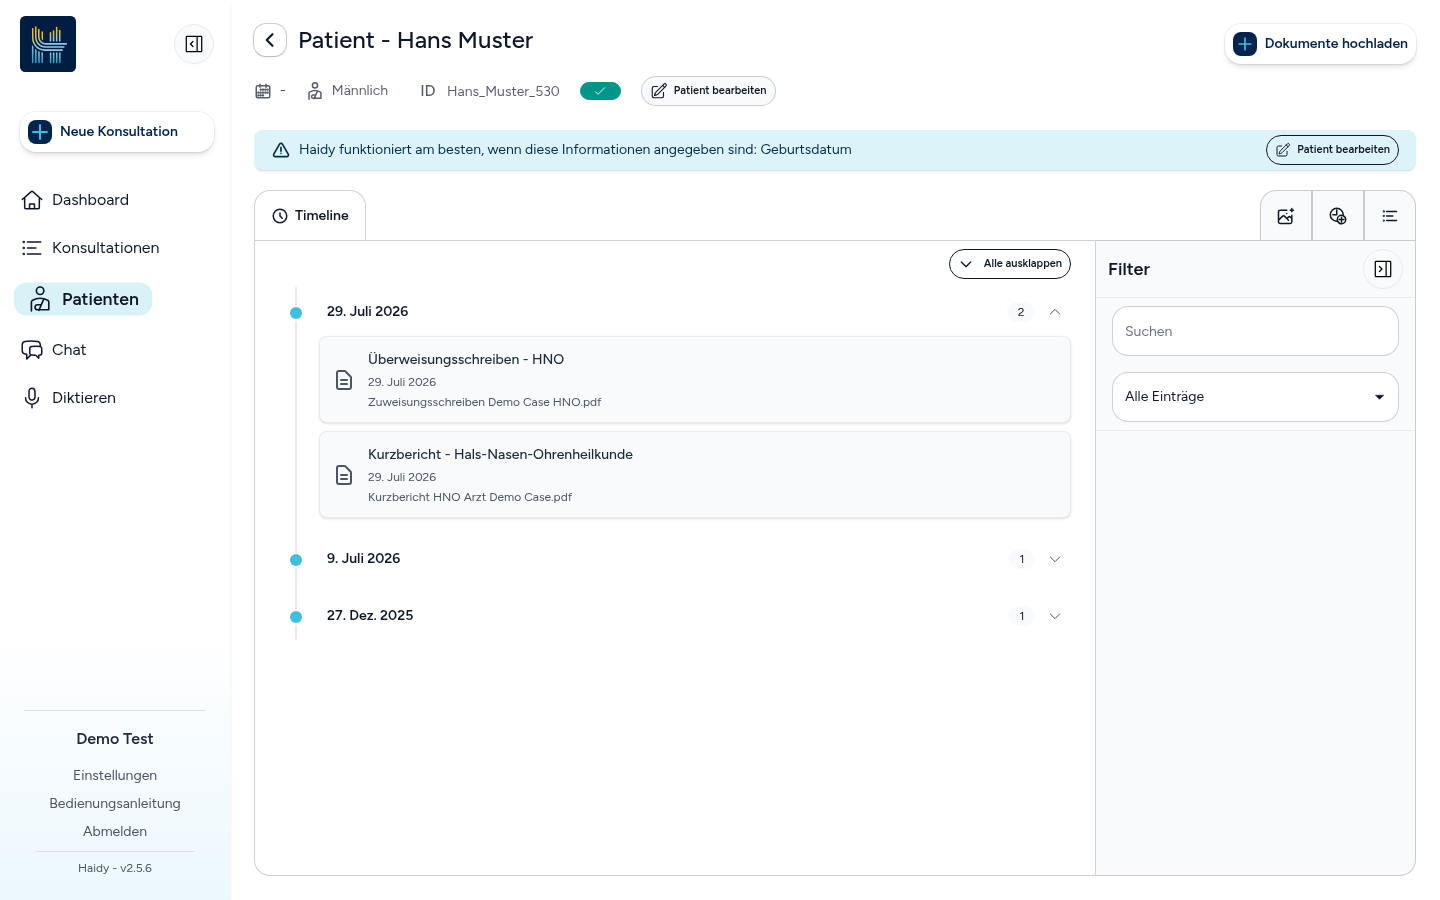
Header area
- Edit Patient – change the master data,
- Upload documents – add documents to the patient file; you can also drop files anywhere on the page (“Drop files to upload”),
- Information such as sex and ID, plus a notice if important data (e.g. date of birth) is missing.
Timeline
The “Timeline” tab shows the chronological course of the patient file – ordered by date (e.g. “29 July 2026”). Each entry stands for a document (e.g. referral letter, short report) with date and file name.
- “Expand all” – expand all date groups,
- Click on a date header – expand/collapse the group,
- Click on “View” on an entry – open the document.
Filter (right column)
In the filter area you can search the entries (“Search”) and filter by entry type (e.g. “All history”).
Correcting document details
Haidy reads the details of a document (name, date, practitioner, document type) automatically. If something was recognised incorrectly, you can correct it:
- Open the document in the viewer – for example via “View” in the timeline or via the patient files of a consultation.
- Click on “Edit details” in the header of the viewer, next to “Download”.
- Correct Name, Date, Practitioner, Document type, Facility type and Practice setting in the dialog “Edit file details” and confirm with “Save”.
Your corrections are stored separately – the extracted data stays untouched. An empty field keeps the extracted value; in the selection fields, “Use extracted value” restores the original value of that field. “Reset to extracted data” removes all corrections at once.
The corrected name and date are shown everywhere the document appears, for example in the timeline and in a consultation.